Cookbook:OpenAI 集成(Python)
这是一份 Litefuse OpenAI 集成(Python)的 cookbook 示例集。
请按照集成指南将本集成加入到你的 OpenAI 项目中。
准备工作
本集成兼容 OpenAI SDK >=0.27.8 版本。在 OpenAI SDK >=1.0.0 版本上,还支持异步函数和流式调用。
%pip install langfuse openai --upgradeimport os
# Get keys for your project from the project settings page: https://litefuse.cloud
os.environ["LANGFUSE_PUBLIC_KEY"] = "pk-lf-..."
os.environ["LANGFUSE_SECRET_KEY"] = "sk-lf-..."
os.environ["LANGFUSE_BASE_URL"] = "https://litefuse.cloud"
# Your openai key
os.environ["OPENAI_API_KEY"] = "sk-proj-..."# instead of: import openai
from langfuse.openai import openai示例
Chat completion(文本)
completion = openai.chat.completions.create(
  name="test-chat",
  model="gpt-4o",
  messages=[
      {"role": "system", "content": "You are a very accurate calculator. You output only the result of the calculation."},
      {"role": "user", "content": "1 + 1 = "}],
  temperature=0,
  metadata={"someMetadataKey": "someValue"},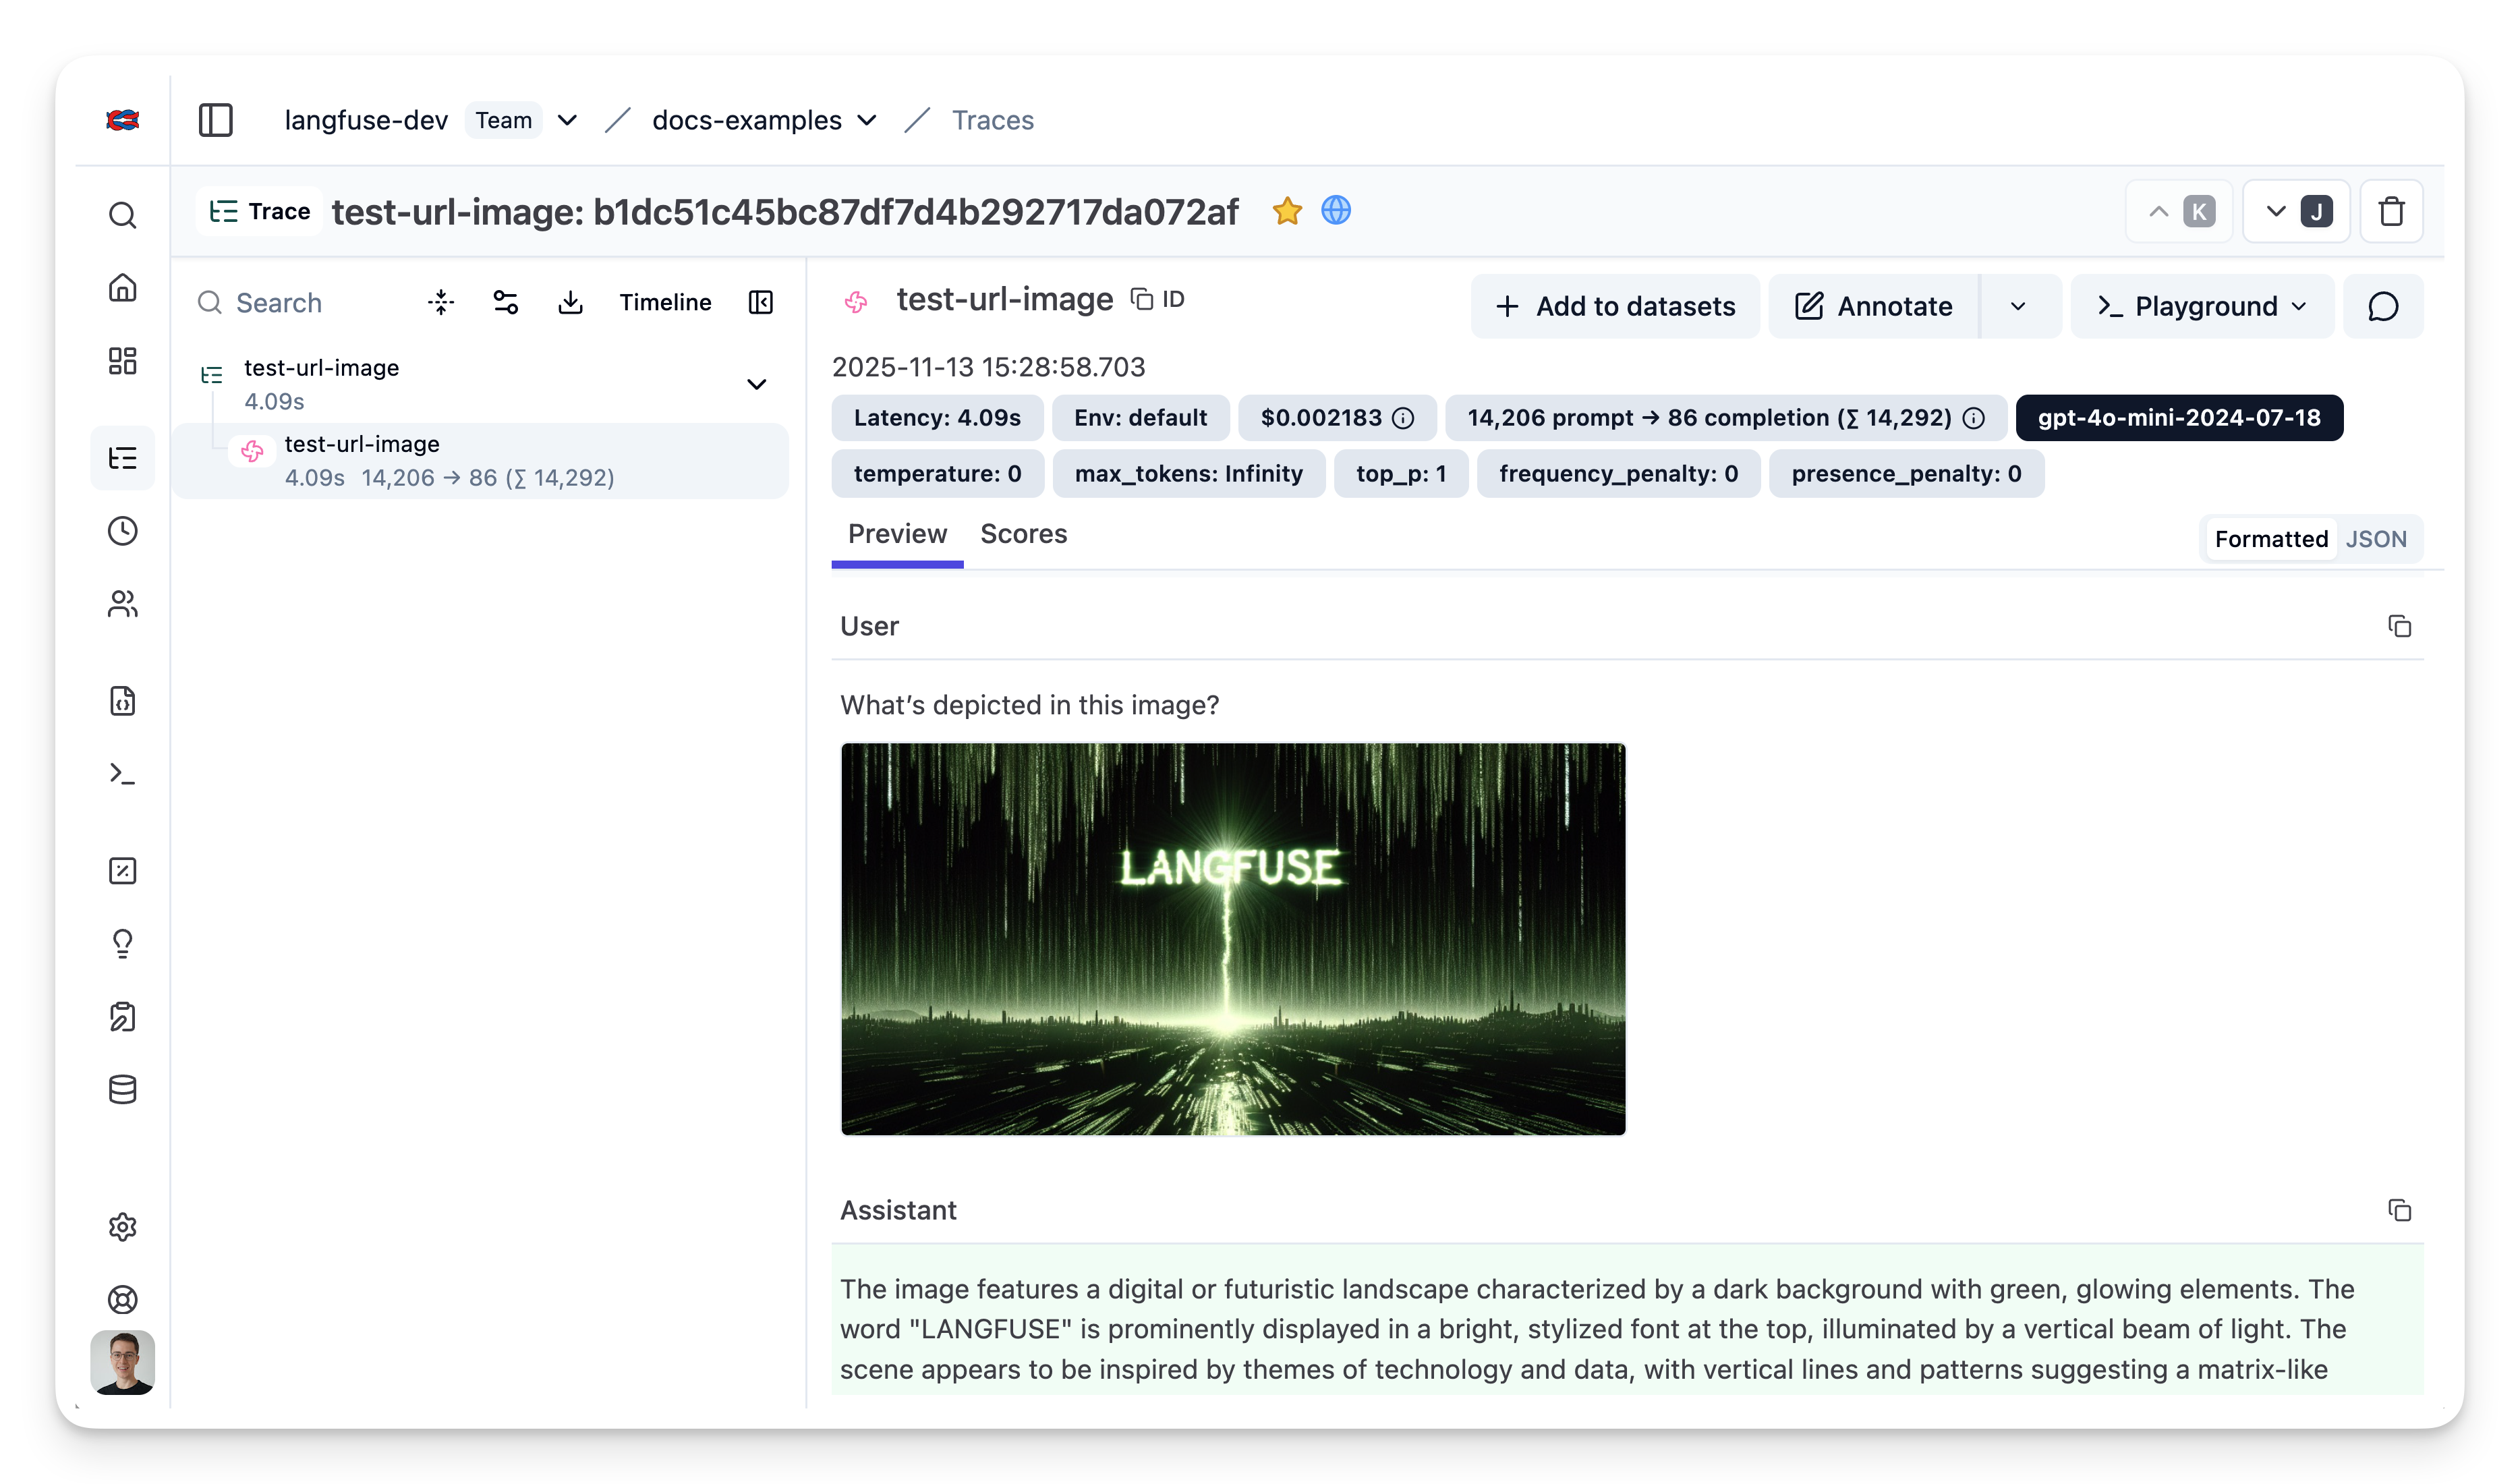
)Chat completion(图片)
下面是一个使用 OpenAI 视觉能力的简单示例。图片可以通过 user 消息传入。
completion = openai.chat.completions.create(
  name="test-url-image",
  model="gpt-4o-mini", # GPT-4o, GPT-4o mini, and GPT-4 Turbo have vision capabilities
  messages=[
      {"role": "system", "content": "You are an AI trained to describe and interpret images. Describe the main objects and actions in the image."},
      {"role": "user", "content": [
        {"type": "text", "text": "What’s depicted in this image?"},
        {
          "type": "image_url",
          "image_url": {
            "url": "https://static.langfuse.com/langfuse-dev/langfuse-example-image.jpeg",
          },
        },
      ],
    }
  ],
  temperature=0,
  metadata={"someMetadataKey": "someValue"},
)
打开 https://litefuse.cloud 或你的自托管实例,即可看到生成结果。
Chat completion(流式)
下面是一个使用 OpenAI 流式调用的简单示例。
completion = openai.chat.completions.create(
  name="test-chat",
  model="gpt-4o",
  messages=[
      {"role": "system", "content": "You are a professional comedian."},
      {"role": "user", "content": "Tell me a joke."}],
  temperature=0,
  metadata={"someMetadataKey": "someValue"},
  stream=True
)

for chunk in completion:
  print(chunk.choices[0].delta.content, end="")
Why don’t scientists trust atoms?
Because they make up everything!None
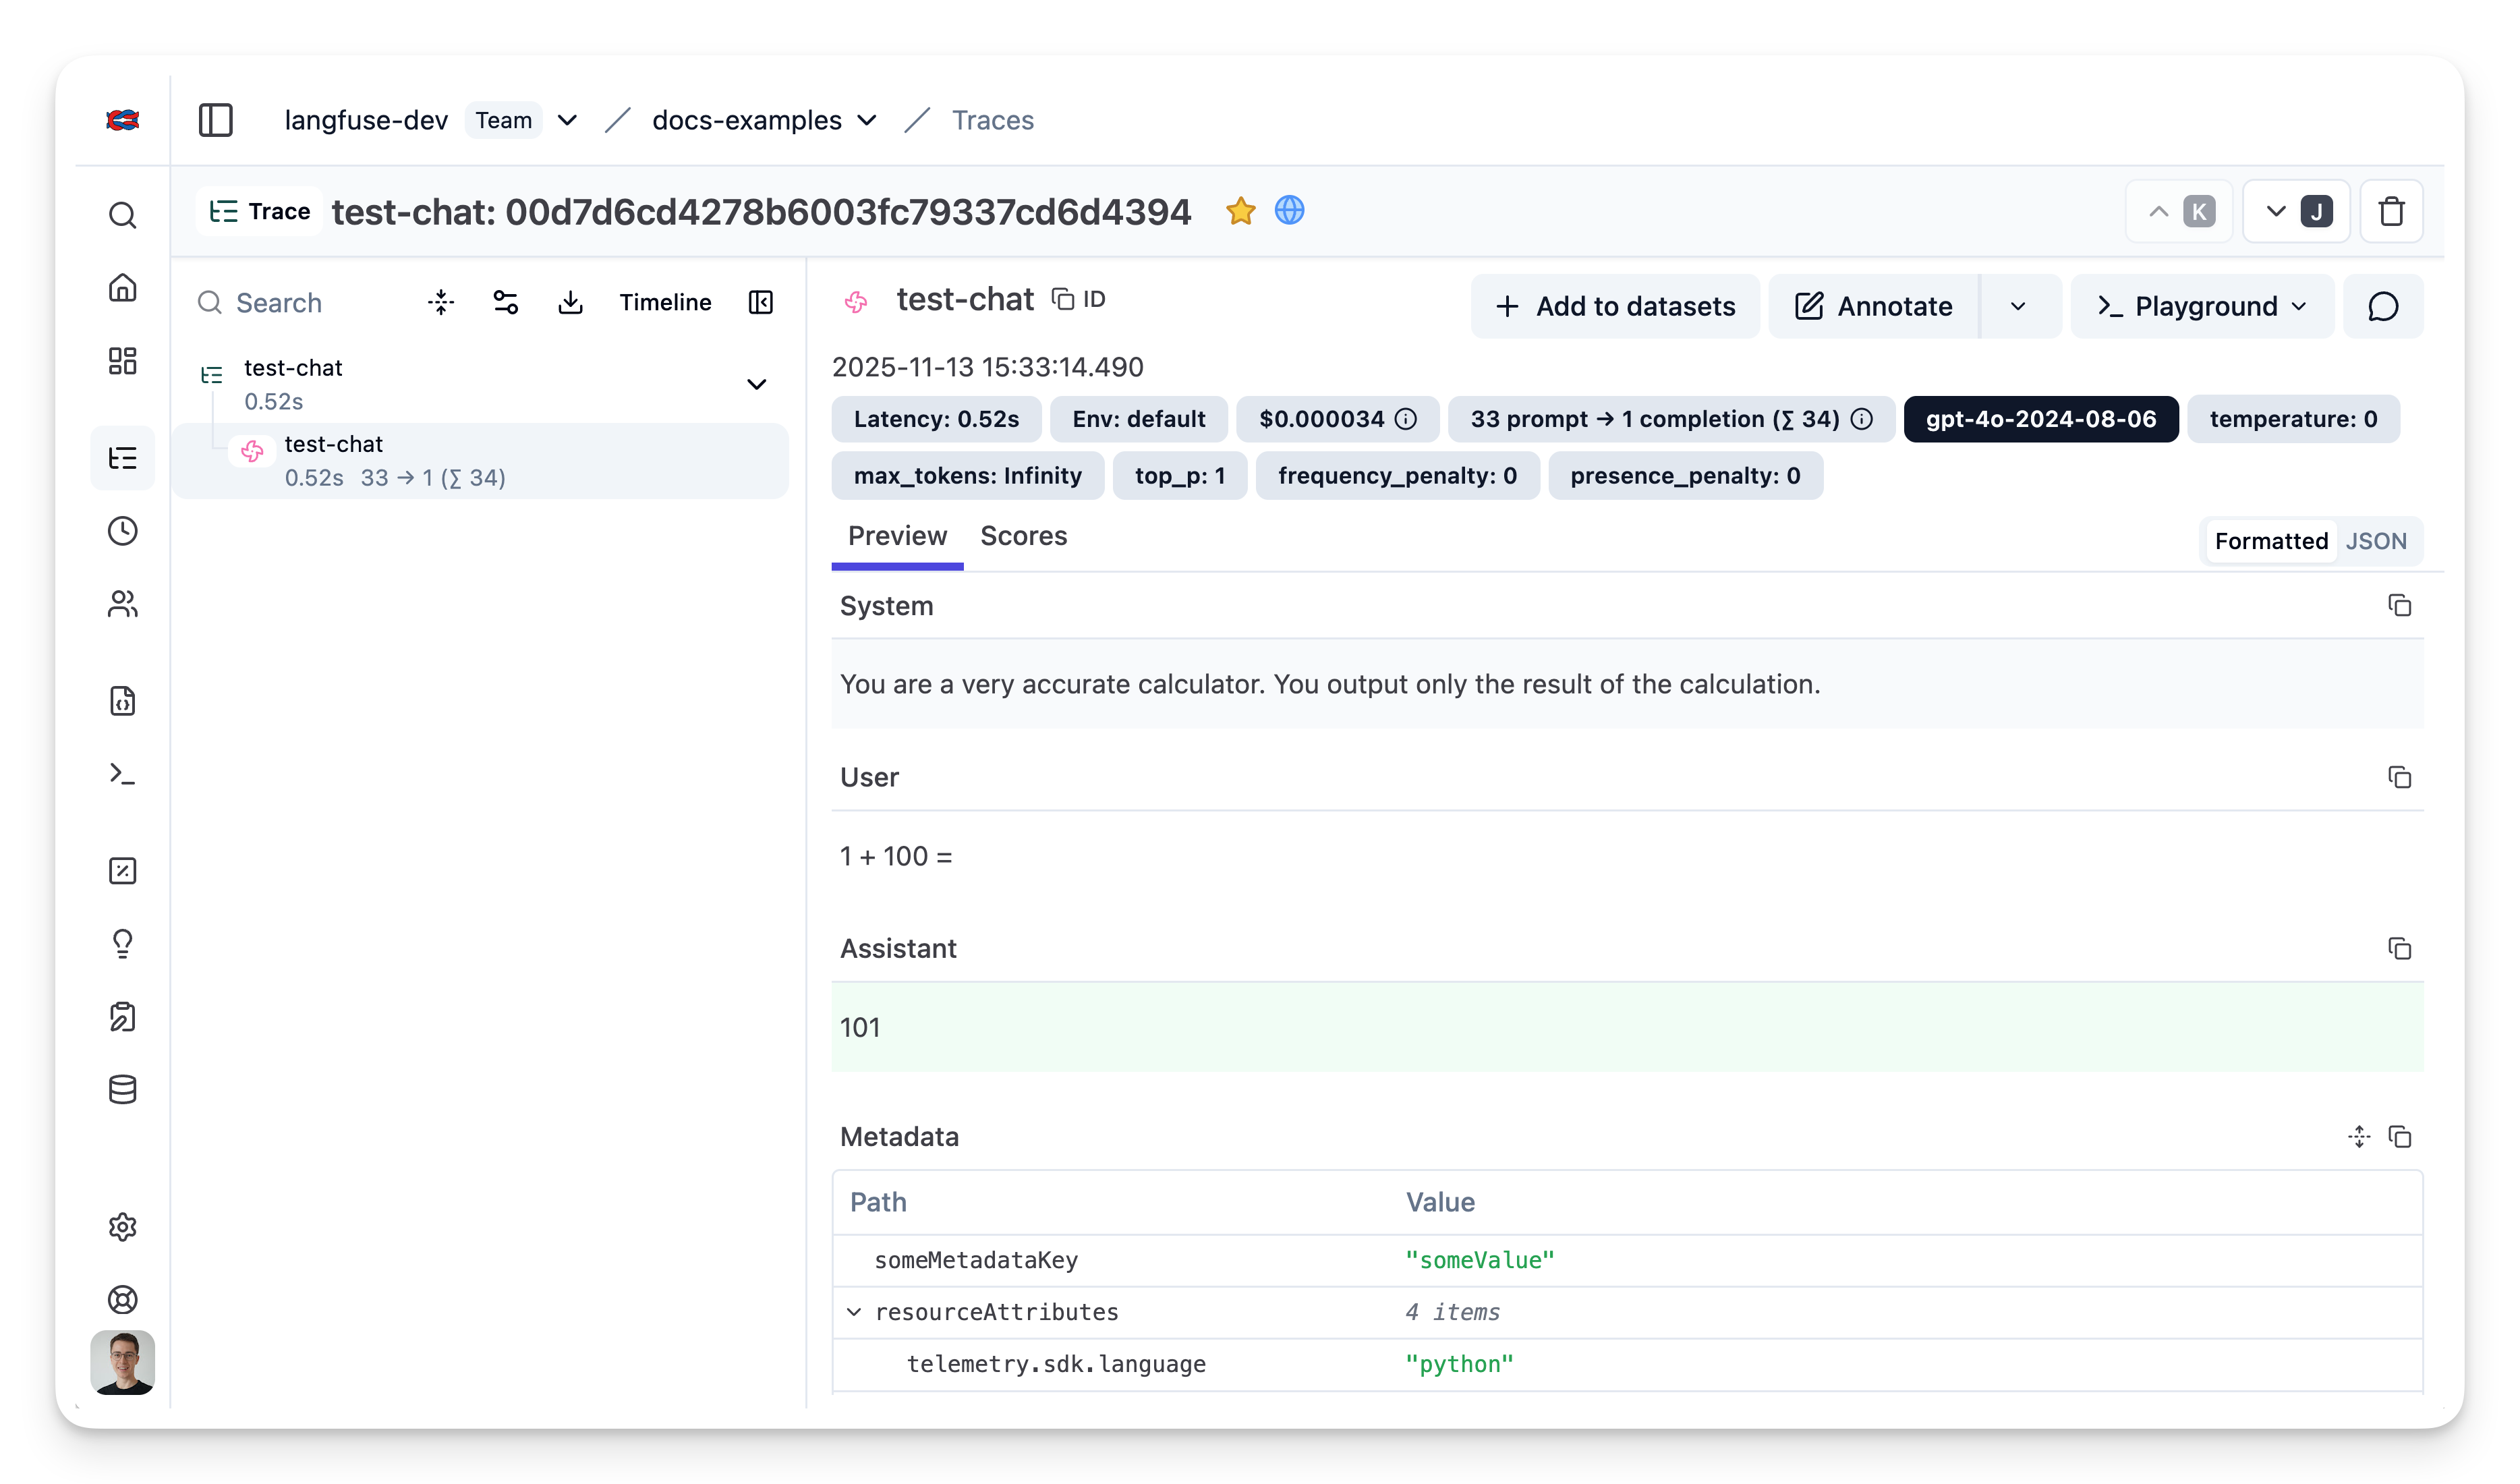
Chat completion(异步)
下面是一个使用 OpenAI 异步 client 的简单示例。Litefuse 的配置可以来自环境变量,也可以来自 openai 模块上的属性。
from langfuse.openai import AsyncOpenAI

async_client = AsyncOpenAI()
completion = await async_client.chat.completions.create(
name="test-chat",
model="gpt-4o",
messages=[
{"role": "system", "content": "You are a very accurate calculator. You output only the result of the calculation."},
{"role": "user", "content": "1 + 100 = "}],
temperature=0,
metadata={"someMetadataKey": "someValue"},
)打开 https://litefuse.cloud 或你的自托管实例,即可看到生成结果。
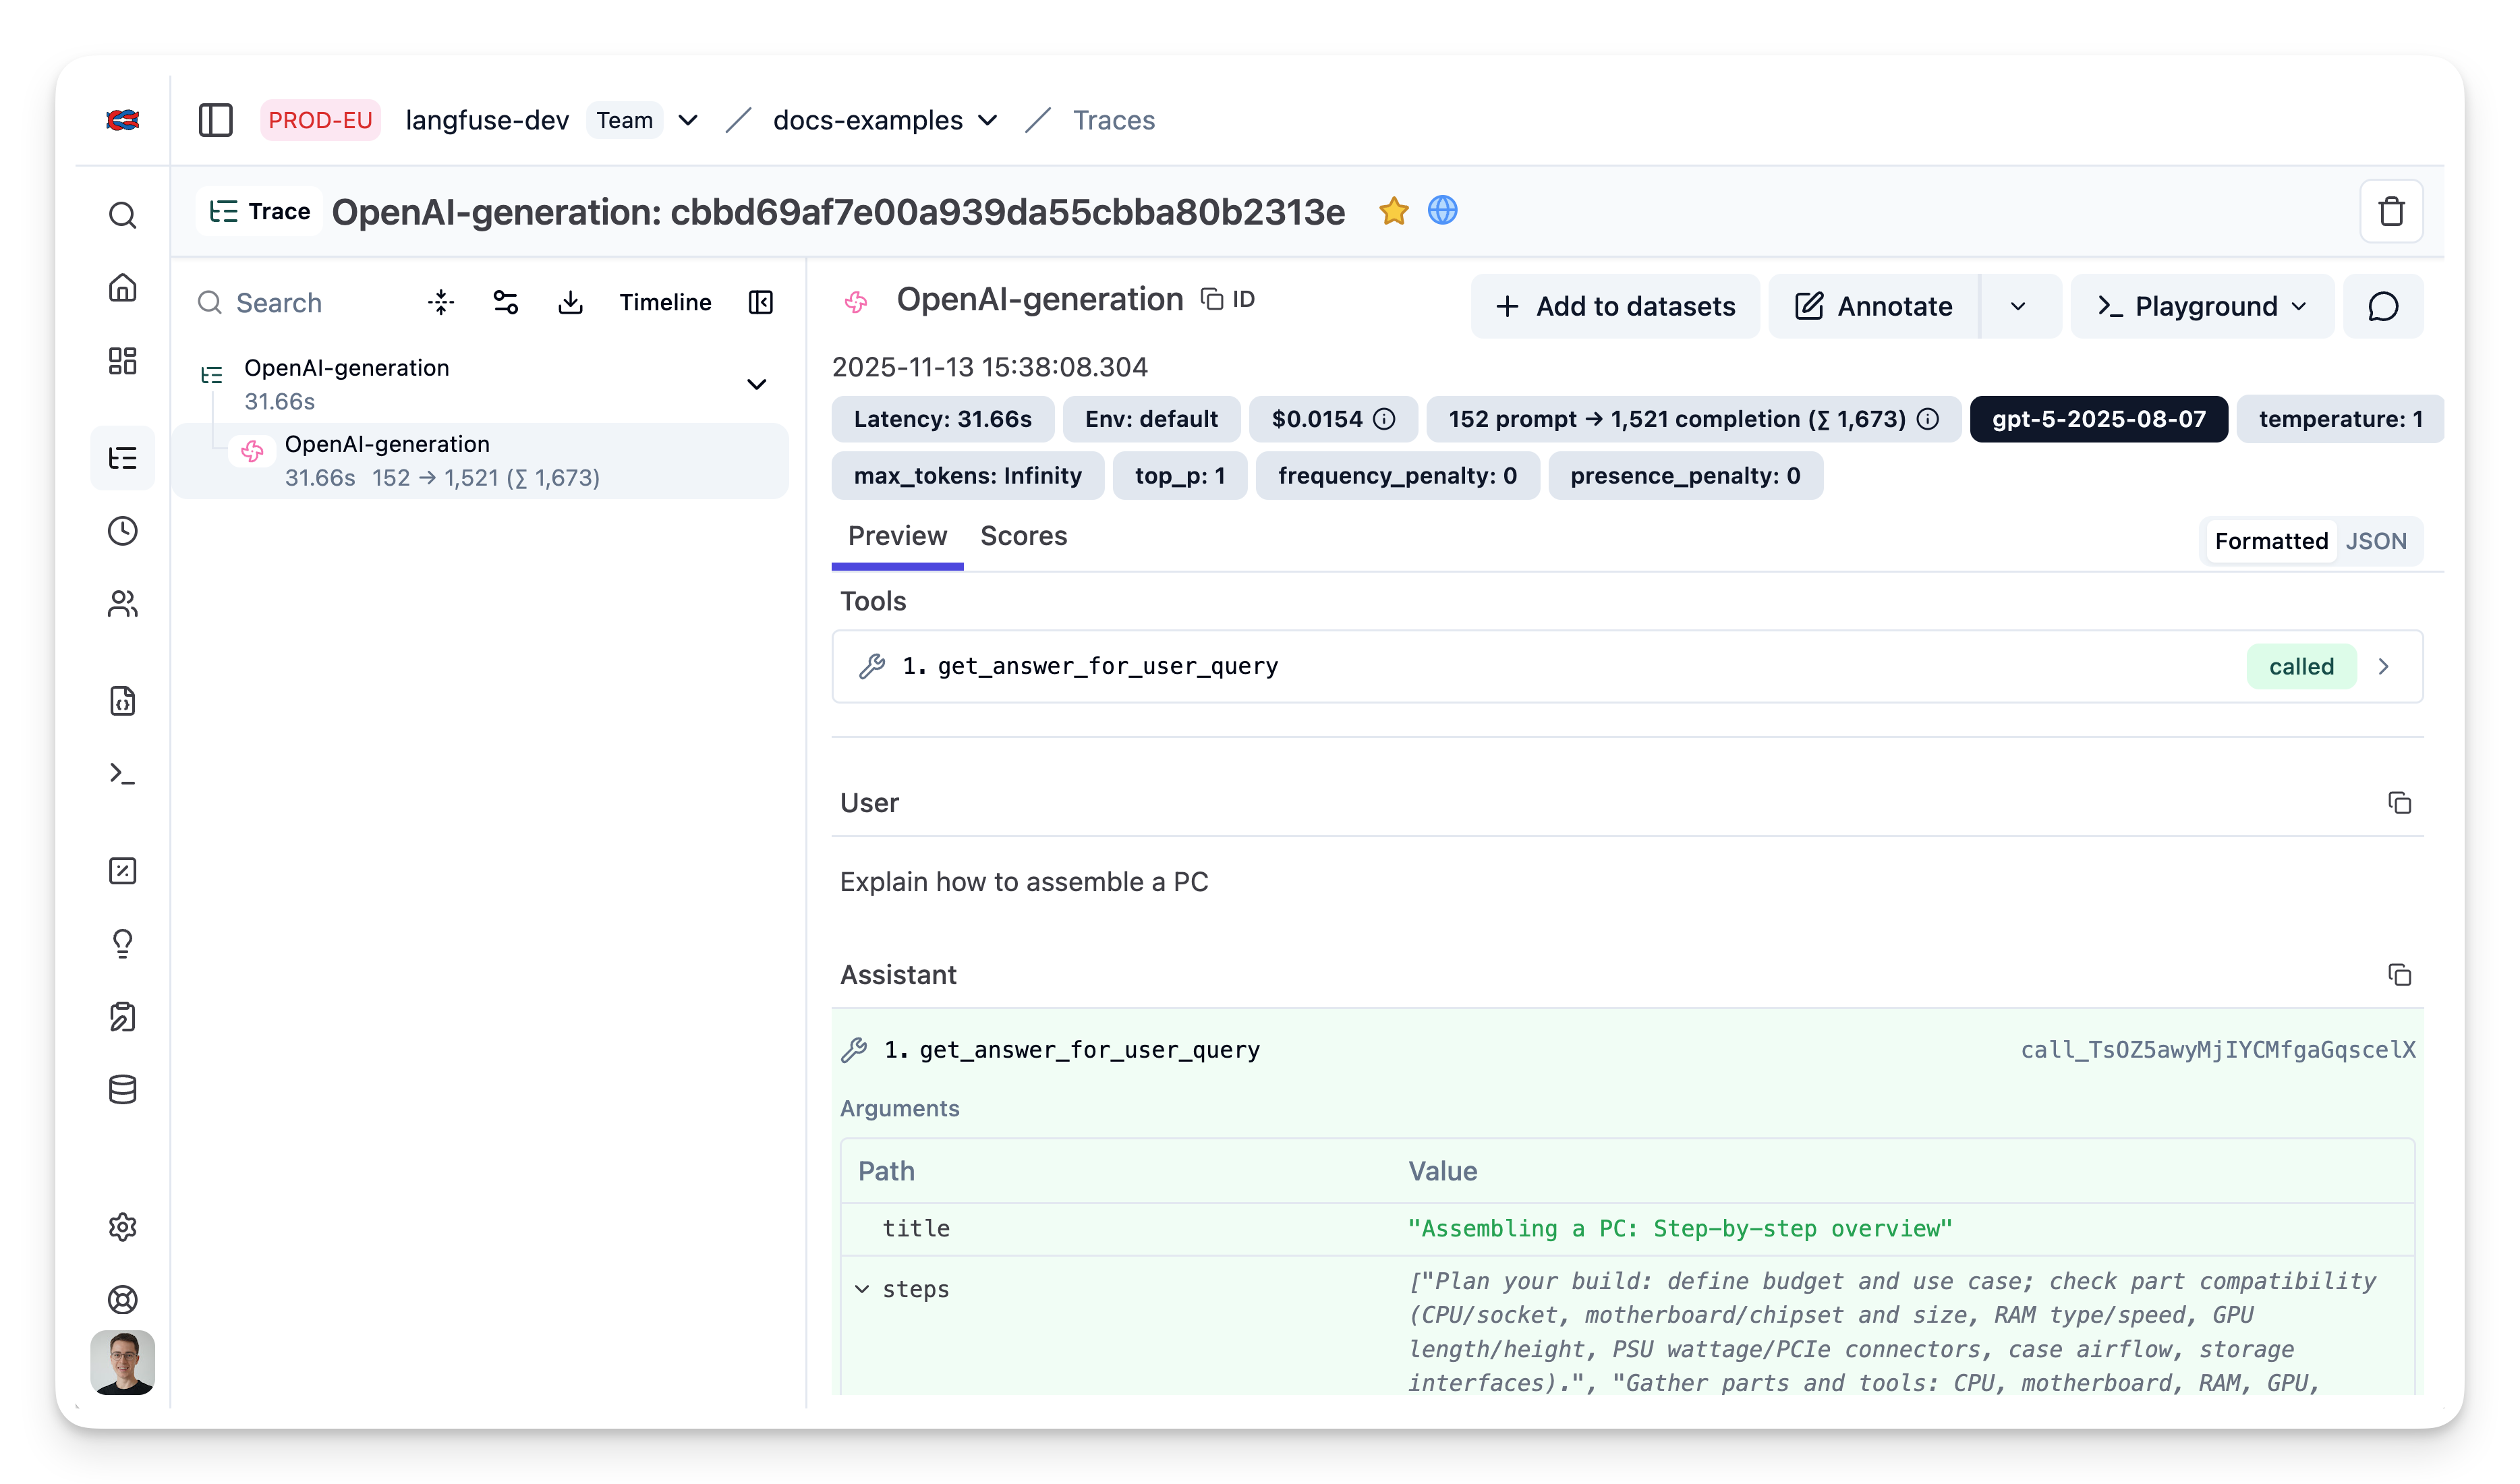
Functions
下面是一个使用 Pydantic 生成 function schema 的简单示例。
%pip install pydantic --upgradefrom typing import List
from pydantic import BaseModel
class StepByStepAIResponse(BaseModel):
title: str
steps: List[str]
schema = StepByStepAIResponse.model_json_schema() # returns a dict like JSON schemafrom openai import OpenAI
import json
client = OpenAI()
response = client.chat.completions.create(
model="gpt-5",
messages=[
{"role": "user", "content": "Explain how to assemble a PC"}
],
tools=[
{
"type": "function",
"function": {
"name": "get_answer_for_user_query",
"description": "Get user answer in a series of steps",
"parameters": StepByStepAIResponse.model_json_schema()
}
}
],
tool_choice={"type": "function", "function": {"name": "get_answer_for_user_query"}}
)
tool_call = response.choices[0].message.tool_calls[0]
args = json.loads(tool_call.function.arguments)打开 https://litefuse.cloud 或你的自托管实例,即可看到生成结果。
Litefuse 特性(User、Tags、Metadata、Session)
你可以通过在 OpenAI 请求中添加相应属性,使用更多 Litefuse 特性。Litefuse 集成会自动解析这些属性。完整能力列表见文档。
from langfuse.openai import openai

completion = openai.chat.completions.create(
  name="test-chat",
  model="gpt-3.5-turbo",
  messages=[
    {"role": "system", "content": "You are a calculator."},
    {"role": "user", "content": "1 + 1 = "}],
  temperature=0,
  metadata={
    "langfuse_tags": ["tag-1", "tag-2"],
    "langfuse_user_id": "user-123",
    "langfuse_session_id": "session-123",
    "langfuse_metadata": {"key": "value"}
  }
)
示例 trace:https://litefuse.cloud/project/cloramnkj0002jz088vzn1ja4/traces/286c5c70-b077-4826-a493-36c510362a5a
AzureOpenAI
本集成同样适用于 AzureOpenAI 和 AsyncAzureOpenAI 类。
AZURE_OPENAI_KEY=""
AZURE_ENDPOINT=""
AZURE_DEPLOYMENT_NAME="cookbook-gpt-4o-mini" # example deployment name
# instead of: from openai import AzureOpenAI
from langfuse.openai import AzureOpenAIclient = AzureOpenAI(
api_key=AZURE_OPENAI_KEY,
api_version="2023-03-15-preview",
azure_endpoint=AZURE_ENDPOINT
)client.chat.completions.create(
name="test-chat-azure-openai",
model=AZURE_DEPLOYMENT_NAME, # deployment name
messages=[
{"role": "system", "content": "You are a very accurate calculator. You output only the result of the calculation."},
{"role": "user", "content": "1 + 1 = "}],
temperature=0,
)示例 trace:https://litefuse.cloud/project/cloramnkj0002jz088vzn1ja4/traces/7ceb3ee3-0f2a-4f36-ad11-87ff636efd1e
把多次 generation 归入同一个 trace
很多应用会涉及多次 OpenAI 调用。@observe() 装饰器可以把一次 API 调用里所有的 LLM 调用都嵌套到 Litefuse 中的同一个 trace 下。
from langfuse.openai import openai
from langfuse import observe

@observe() # decorator to automatically create trace and nest generations
def main(country: str, user_id: str, **kwargs) -> str:
    # nested generation 1: use openai to get capital of country
    capital = openai.chat.completions.create(
      name="geography-teacher",
      model="gpt-4o",
      messages=[
          {"role": "system", "content": "You are a Geography teacher helping students learn the capitals of countries. Output only the capital when being asked."},
          {"role": "user", "content": country}],
      temperature=0,
    ).choices[0].message.content

    # nested generation 2: use openai to write poem on capital
    poem = openai.chat.completions.create(
      name="poet",
      model="gpt-4o",
      messages=[
          {"role": "system", "content": "You are a poet. Create a poem about a city."},
          {"role": "user", "content": capital}],
      temperature=1,
      max_tokens=200,
    ).choices[0].message.content

    return poem

# run main function and let Langfuse decorator do the rest
print(main("Bulgaria", "admin"))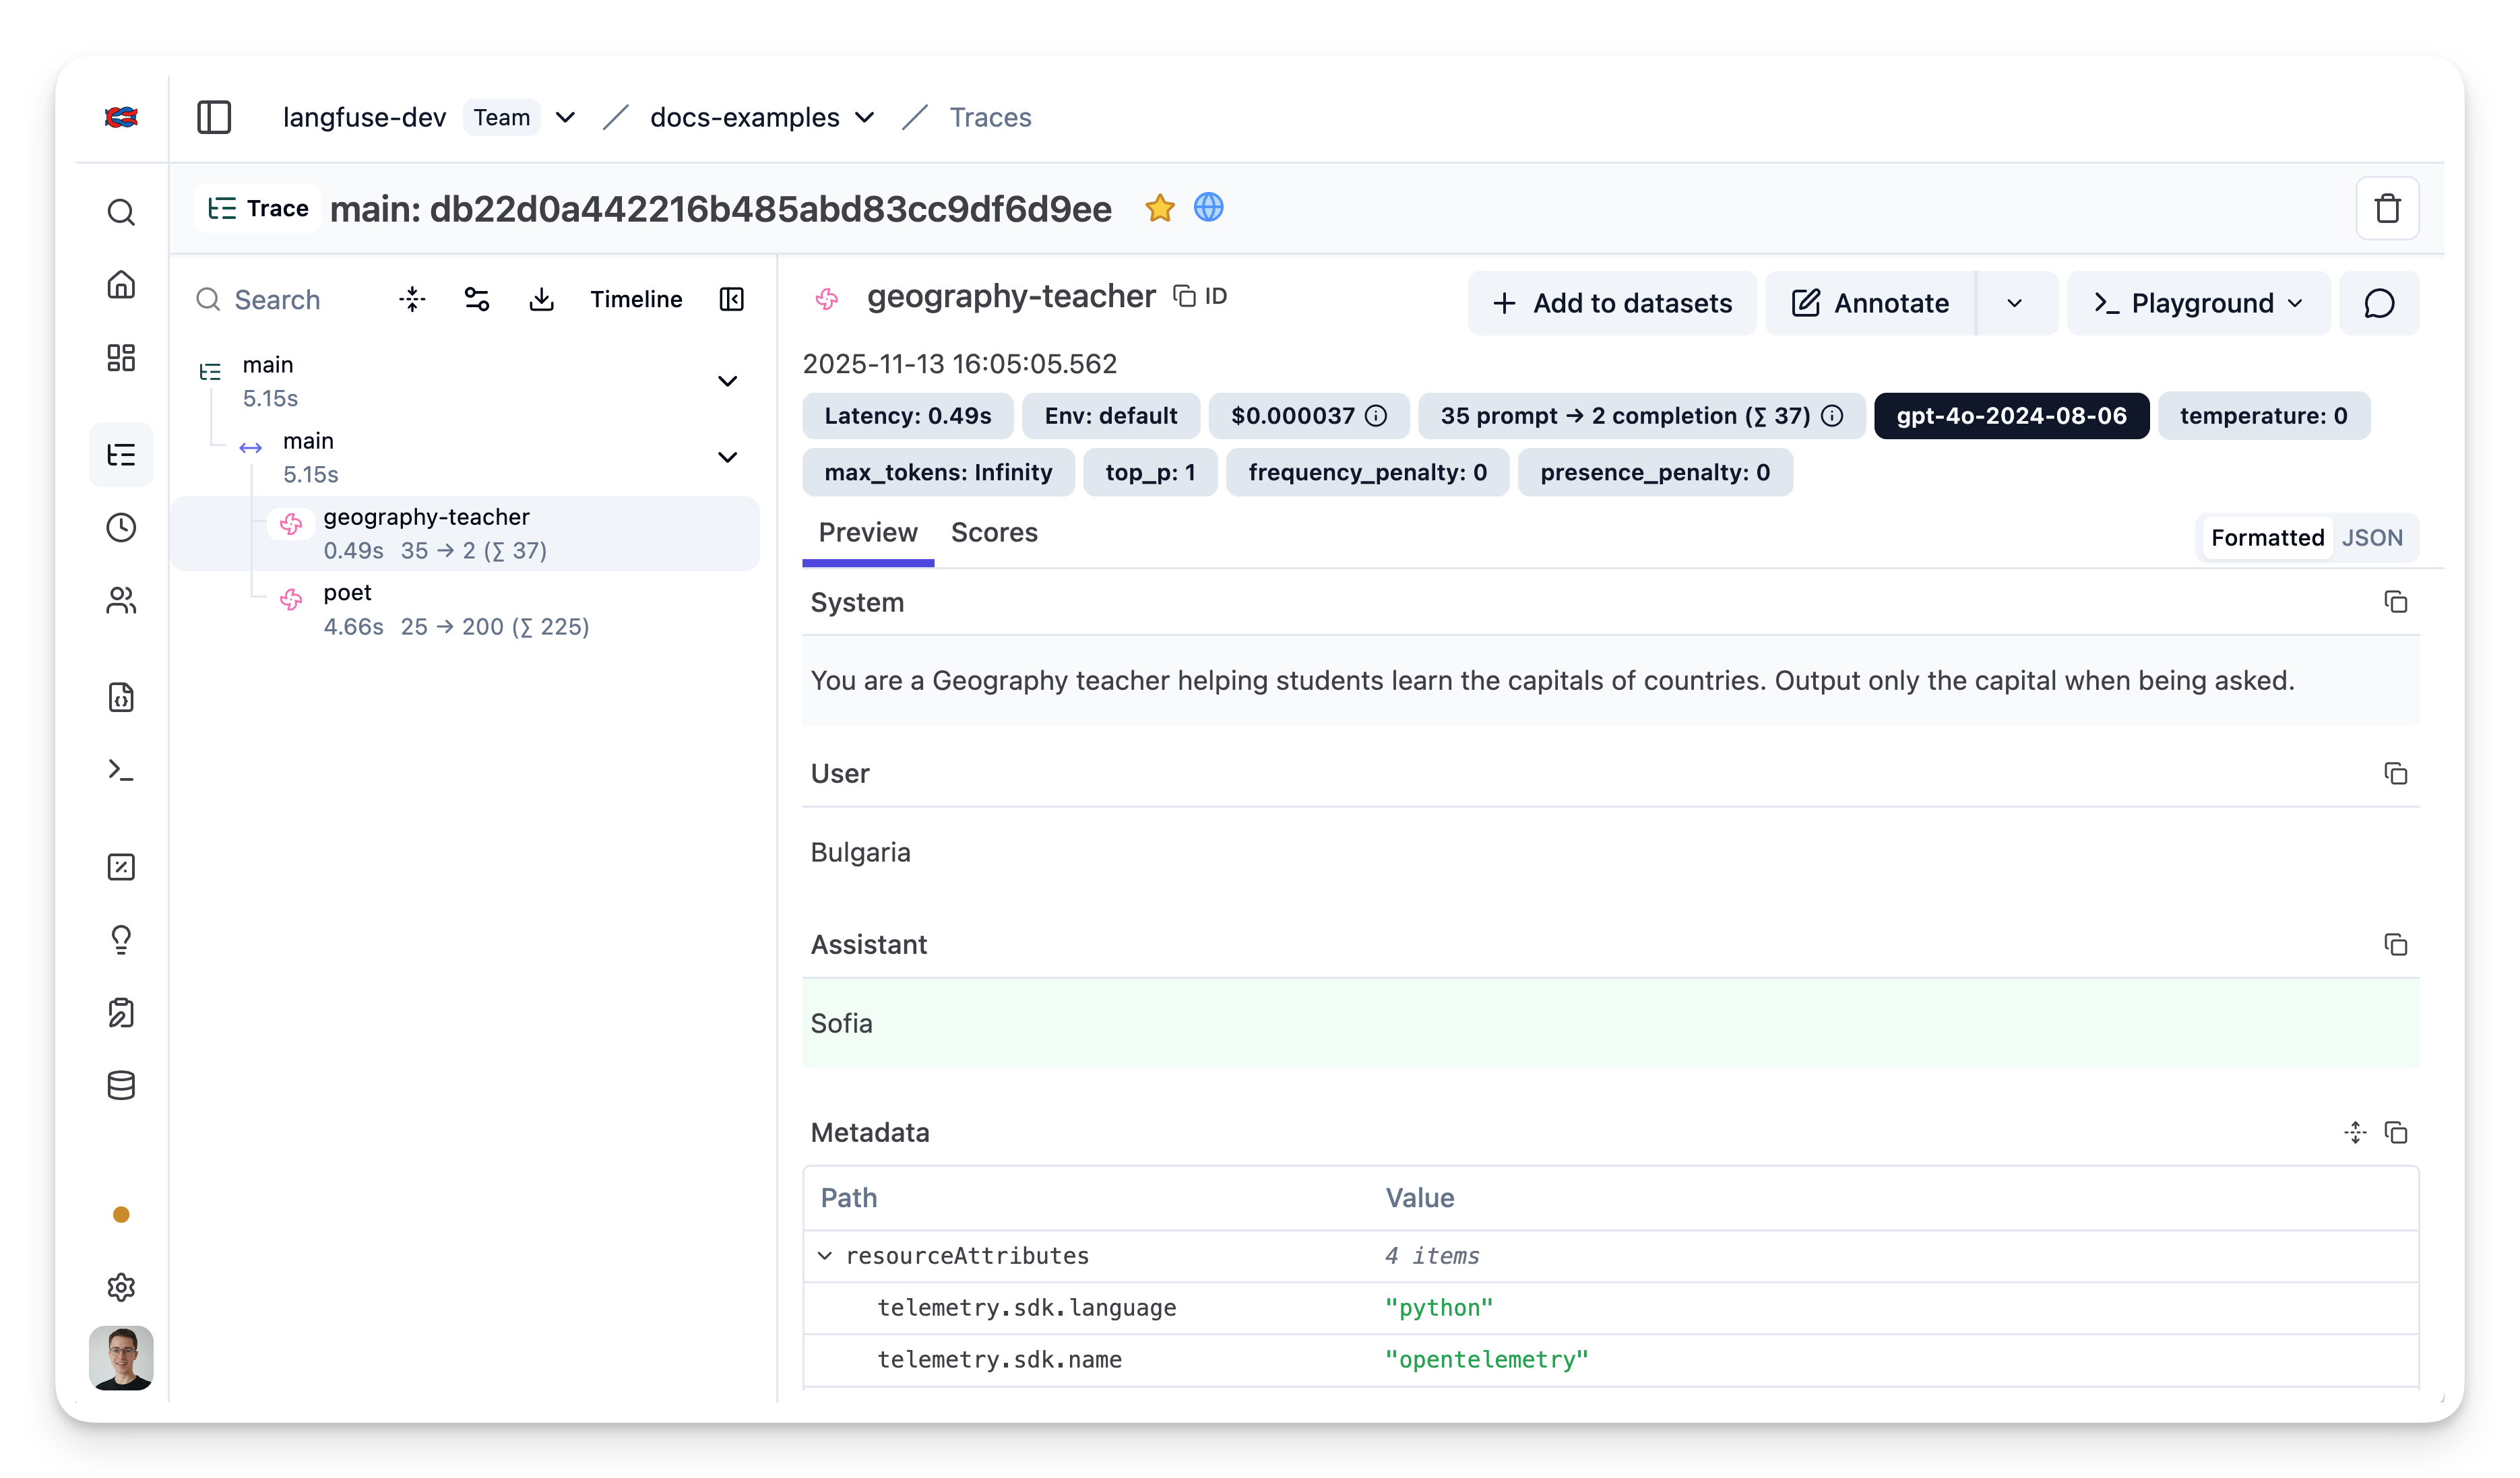
完整能力:与 Langfuse SDK 的互操作性
trace 是 Litefuse 的核心对象,你可以为它添加丰富的元数据。完整文档请见 Python SDK 文档。
自定义 trace 启用的部分能力:
- 用自定义名称标识某种特定类型的 trace
- 用户级追踪
- 通过版本和 release 跟踪实验
- 自定义 metadata
from langfuse.openai import openai
from langfuse import observe, get_client, propagate_attributes
langfuse = get_client()

@observe() # decorator to automatically create trace and nest generations
def main(country: str, user_id: str, **kwargs) -> str:

    # Propagate attributes to all child observations
    with propagate_attributes(
        session_id="1234",
        user_id=user_id,
        tags=["tag1", "tag2"],
        metadata = {"env": "development"}
    ):

      # nested generation 1: use openai to get capital of country
      capital = openai.chat.completions.create(
        name="geography-teacher",
        model="gpt-4o",
        messages=[
            {"role": "system", "content": "You are a Geography teacher helping students learn the capitals of countries. Output only the capital when being asked."},
            {"role": "user", "content": country}],
        temperature=0,
      ).choices[0].message.content

      # nested generation 2: use openai to write poem on capital
      poem = openai.chat.completions.create(
        name="poet",
        model="gpt-4o",
        messages=[
            {"role": "system", "content": "You are a poet. Create a poem about a city."},
            {"role": "user", "content": capital}],
        temperature=1,
        max_tokens=200,
      ).choices[0].message.content

    return poem

# create random trace_id, could also use existing id from your application, e.g. conversation id
trace_id = langfuse.create_trace_id()

# run main function, set your own id, and let Langfuse decorator do the rest
print(main("Bulgaria", "admin", langfuse_observation_id=trace_id))通过代码写入 score
你可以为 trace 添加 score,用来记录用户反馈或某种程序化的评估结果。Litefuse 在很多地方都会用到 score —— 用来过滤 trace、展示在仪表板上等。更多细节请见 score 文档。
score 通过 trace_id 关联到 trace。
from langfuse import observe, get_client
langfuse = get_client()

@observe() # decorator to automatically create trace and nest generations
def main():
    # get trace_id of current trace
    trace_id = langfuse.get_current_trace_id()

    # rest of your application ...

    return "res", trace_id

# execute the main function to generate a trace
_, trace_id = main()

# Score the trace from outside the trace context
langfuse.create_score(
    trace_id=trace_id,
    name="my-score-name",
    value=1
)