Cookbook:Langfuse JS/TS SDK
JS/TS 应用既可以通过 Langfuse JS/TS SDK 进行 trace,也可以使用 OpenAI、LangChain 或 Vercel AI SDK 这样的原生集成。
在本 notebook 中,我们会带你走完一个 简单的端到端示例,内容包括:
- 演示如何通过底层 SDK 方法记录任意 LLM 调用
- 使用与底层 SDK 互通的集成
- LangChain 集成
- OpenAI 集成
- Vercel AI SDK
本指南假设你已经熟悉 Litefuse 的数据模型(trace、span、generation 等)。如果还不熟悉,请先阅读 trace 的概念介绍。
配置环境
注册 Litefuse Cloud 或自托管 Litefuse 获取 Litefuse API key。你还需要一个 OpenAI API key。
注意:本 cookbook 使用 Deno.js 执行代码,包导入和环境变量设置的语法与 Node.js 不同。在 Node.js 应用中,准备步骤类似,但使用标准的
npm包以及process.env。
// Litefuse authentication keys
Deno.env.set("LANGFUSE_PUBLIC_KEY", "pk-lf-***");
Deno.env.set("LANGFUSE_SECRET_KEY", "sk-lf-***");

// Litefuse host configuration
Deno.env.set("LANGFUSE_BASE_URL", "https://litefuse.cloud")

// Set environment variables using Deno-specific syntax
Deno.env.set("OPENAI_API_KEY", "sk-proj-***");
设置好环境变量后,我们就可以初始化 langfuseSpanProcessor,并把它传给负责 trace 编排的 OpenTelemetry SDK。
// Import required dependencies
import 'npm:dotenv/config';
import { NodeSDK } from "npm:@opentelemetry/sdk-node";
import { LangfuseSpanProcessor } from "npm:@langfuse/otel";

// Export the processor to be able to flush it later
// This is important for ensuring all spans are sent to Litefuse
export const langfuseSpanProcessor = new LangfuseSpanProcessor({
    publicKey: process.env.LANGFUSE_PUBLIC_KEY!,
    secretKey: process.env.LANGFUSE_SECRET_KEY!,
    baseUrl: process.env.LANGFUSE_BASE_URL ?? 'https://litefuse.cloud', // Default to cloud if not specified
    environment: process.env.NODE_ENV ?? 'development', // Default to development if not specified
  });

// Initialize the OpenTelemetry SDK with Langfuse processor
const sdk = new NodeSDK({
  spanProcessors: [langfuseSpanProcessor],
});

// Start the SDK to begin collecting telemetry
// The warning about crypto module is expected in Deno and doesn't affect basic tracing functionality. Media upload features will be disabled, but all core tracing works normally
sdk.start();
LangfuseClient 在 OpenTelemetry trace 之外还提供了额外功能,例如打分、prompt 管理以及数据查询。它会自动使用我们之前设置的同一组环境变量。
import { LangfuseClient } from "npm:@langfuse/client";

const langfuse = new LangfuseClient();
记录 LLM 调用
你可以使用 SDK 记录任意 LLM 调用,也可以使用任意与之互通的 集成。
下面,我们会演示如何使用 SDK、LangChain、Vercel AI SDK 和 OpenAI 集成来记录 LLM 调用。
方式 1:上下文管理器
为了简化嵌套与上下文管理,你可以使用 startActiveObservation。这些函数接收一个回调,并自动管理 observation 的生命周期和 OpenTelemetry 上下文。在回调内部创建的任何 observation 都会自动作为当前 active observation 的子项,回调结束时 observation 也会自动结束。
这是大多数场景下推荐的写法,因为它能防止上下文泄漏,并确保 observation 正确结束。
// Import necessary functions from the tracing package
import { startActiveObservation, startObservation, propagateAttributes, updateActiveObservation } from "npm:@langfuse/tracing";

// Start a new span with automatic context management
await startActiveObservation("context-manager", async (span) => {
  // Log the initial user query
  span.update({
    input: { query: "What is the capital of France?" }
  });

  // Create a new generation span that will automatically be a child of "context-manager"
  const generation = startObservation(
    "llm-call",
    {
    model: "gpt-4",
    input: [{ role: "user", content: "What is the capital of France?" }],
    },
    { asType: "generation" },
  );

  // ... LLM call logic would go here ...

  // Update the generation with token usage statistics
  generation.update({
    usageDetails: {
      input: 10, // Number of input tokens
      output: 5, // Number of output tokens
      cache_read_input_tokens: 2, // Tokens read from cache
      some_other_token_count: 10, // Custom token metric
      total: 17, // Optional: automatically calculated if not provided
    },
  });

  // End the generation with the LLM response
  generation.update({
    output: { content: "The capital of France is Paris." },
  }).end();

  // Example user information
  const user = { id: "user-5678", name: "Jane Doe", sessionId: "123" };

  // Add an optional log level of type warning to the active span
  updateActiveObservation(
    { level: "WARNING", statusMessage: "This is a warning" },
  );

  // Propagate trace attributes with user context via callback
  await propagateAttributes({
    userId: user.id,
    sessionId: user.sessionId,
    metadata: { userName: user.name },
  }, async () => {
    // Mark the span as complete with final output
    span.update({ output: "Successfully answered." });
  });
});

// Ensure all spans are sent to Litefuse
await langfuseSpanProcessor.forceFlush();方式 2:observe 装饰器
observe 包装器是一个强大的工具,可以在不修改函数内部逻辑的情况下对已有函数添加 trace。它的作用类似装饰器,会在函数调用周围自动创建一个 span 或 generation。你可以在被包装的函数内部使用 updateActiveObservation 给 observation 添加属性。
import { observe, updateActiveObservation } from "npm:@langfuse/tracing";

// An existing function
async function fetchData(source: string) {
  updateActiveObservation({ usageDetails: {
    // usage
    input: 10,
    output: 5,
  }, { asType: 'generation' }
})

  // ... logic to fetch data
  return { data: `some data from ${source}` };
}

// Wrap the function to trace it
const tracedFetchData = observe(fetchData, {
  name: "observe-wrapper",
  asType: "generation",
});

// Now, every time you call tracedFetchData, a span is created.
// Its input and output are automatically populated with the
// function's arguments and return value.
const result = await tracedFetchData("API");

await langfuseSpanProcessor.forceFlush();方式 3:手动创建 Span
这部分展示如何通过 Langfuse SDK 手动传入模型与输入/输出,从而记录任意 LLM 调用。
步骤:
- 创建 span,用来在 trace 中包含本段操作
- 创建 generation,记录输入和已知的模型名
- 调用 LLM SDK 并记录输出
- 结束 generation 和 span
通常团队会在一个辅助函数里包装 LLM SDK 调用,并由它统一处理 trace。这种实现只写一次,所有 LLM 调用都可以复用。
// Import the startObservation function for manual span creation
import { startObservation } from 'npm:@langfuse/tracing';

// Create the root span for this operation
const span = startObservation('manual-observation', {
    input: { query: 'What is the capital of France?' },
  });

// Create a child span for a tool call (e.g., weather API)
const toolCall = span.startObservation(
  'fetch-weather',
  { input: { city: 'Paris' } },
  { asType: "tool" },
);
// Simulate API call with timeout

await new Promise((r) => setTimeout(r, 100));
// End the tool call with its output
toolCall.update({ output: { temperature: '15°C' } }).end();

// Create a generation span for the LLM call
const generation = span.startObservation(
  'llm-call',
  {
  model: 'gpt-4',
  input: [{ role: 'user', content: 'What is the capital of France?' }],
  output: { content: 'The capital of France is Paris.' },
  },
  { asType: "generation" },
);

// Update the generation with token usage details
generation.update({
  usageDetails: {
    input: 10,              // Input token count
    output: 5,              // Output token count
    cache_read_input_tokens: 2,  // Cached tokens used
    some_other_token_count: 10,  // Custom metric
    total: 17,              // Total tokens (optional)
  },
});

// End the generation with final output
generation.update({
  output: { content: 'The capital of France is Paris.' },
}).end();

// End the root span with final status and session ID
span.update({
  output: 'Successfully answered user request.',
  sessionId: '123'
}).end();

// Ensure all spans are flushed to Litefuse
await langfuseSpanProcessor.forceFlush();原生集成
除了通过 SDK 方法(装饰器、上下文管理器和手动创建)手动创建 span 外,你还可以使用 OpenAI 或 Langchain 的原生 instrumentation,自动捕获所有 generation 细节。
方式 1:使用 OpenAI
这一步演示如何使用与 Langfuse SDK 互通的 OpenAI 集成来 trace OpenAI 应用。
由于这是原生集成,模型参数和输出都会被自动捕获。
// Import required packages
import OpenAI from "npm:openai@^4";
import { observeOpenAI } from "npm:@langfuse/openai";

// Initialize the OpenAI client
const openai = new OpenAI();

// Wrap the OpenAI client with Langfuse tracing
const tracedOpenAI = observeOpenAI(openai, {
  // Configure trace-level attributes for all API calls
  traceName: "my-openai-trace",      // Name for the trace
  sessionId: "user-session-123",     // Track user session
  userId: "user-abc",                // Track user identity
  tags: ["openai-integration"],      // Add searchable tags
});

// Make an API call using the traced client
// All parameters and responses will be automatically captured
const completion = await tracedOpenAI.chat.completions.create({
  model: "gpt-4",
  messages: [{ role: "user", content: "What is OpenTelemetry?" }],
});方式 2:使用 LangChain
这一步演示如何使用与 Langfuse SDK 完全互通的 LangChain 集成来 trace LangChain 应用。
由于这是原生集成,模型参数和输出都会被自动捕获。
// Import required LangChain and Langfuse packages
import { ChatOpenAI } from "npm:@langchain/openai";
import { ChatPromptTemplate } from "npm:@langchain/core/prompts";
import { CallbackHandler } from "npm:@langfuse/langchain";

// Initialize the Langfuse callback handler with tracing configuration
const langfuseHandler = new CallbackHandler({
  sessionId: "user-session-123",  // Track user session
  userId: "user-abc",            // Track user identity
  tags: ["langchain-test"],      // Add searchable tags
});

// Define the LangChain components
const model = new ChatOpenAI({ model: "gpt-4o" });  // Initialize LLM
const prompt = ChatPromptTemplate.fromTemplate("Tell me a joke about {topic}.");  // Create prompt template
const chain = prompt.pipe(model);  // Combine prompt and model into a chain

// Execute the chain with Langfuse tracing
const result = await chain.invoke(
  { topic: "developers" },  // Input variables for the prompt
  {
    callbacks: [langfuseHandler],  // Enable Langfuse tracing
    runName: "joke-generator",     // Name for the trace (if no active span)
  }
);

// Output the result
console.log(result.content);方式 3:Vercel AI SDK
Vercel AI SDK 提供了基于 OpenTelemetry 的原生 instrumentation。要把 span 发送到你的 Litefuse 实例,需要设置 experimental_telemetry: {isEnabled: true}。
// Import Vercel AI SDK components
import { generateText } from "npm:ai"
import { openai } from "npm:@ai-sdk/openai"

// Generate text with OpenTelemetry tracing enabled
const result_3 = await generateText({
    model: openai('gpt-4.1'),                // Specify the OpenAI model
    prompt: 'Write a short story about a cat.',  // The prompt for generation
    experimental_telemetry: {
      isEnabled: true,                       // Enable OpenTelemetry tracing
      functionId: 'my-awesome-function',     // Identify the function being traced
      metadata: {
        something: 'custom',                 // Custom metadata fields
        someOtherThing: 'other-value',
        sessionId: '123',                    // Track user session
        userId: '456',                       // Track user identity
        tags: ['test', 'langfuse'],         // Add searchable tags
      },
    },
  });
[在 Litefuse UI 中查看公开 trace](在 Litefuse UI 中查看公开 trace)
步骤 5:在 Litefuse 中查看 Trace
span 入库后,你就可以在 Litefuse 仪表板里查看它们。
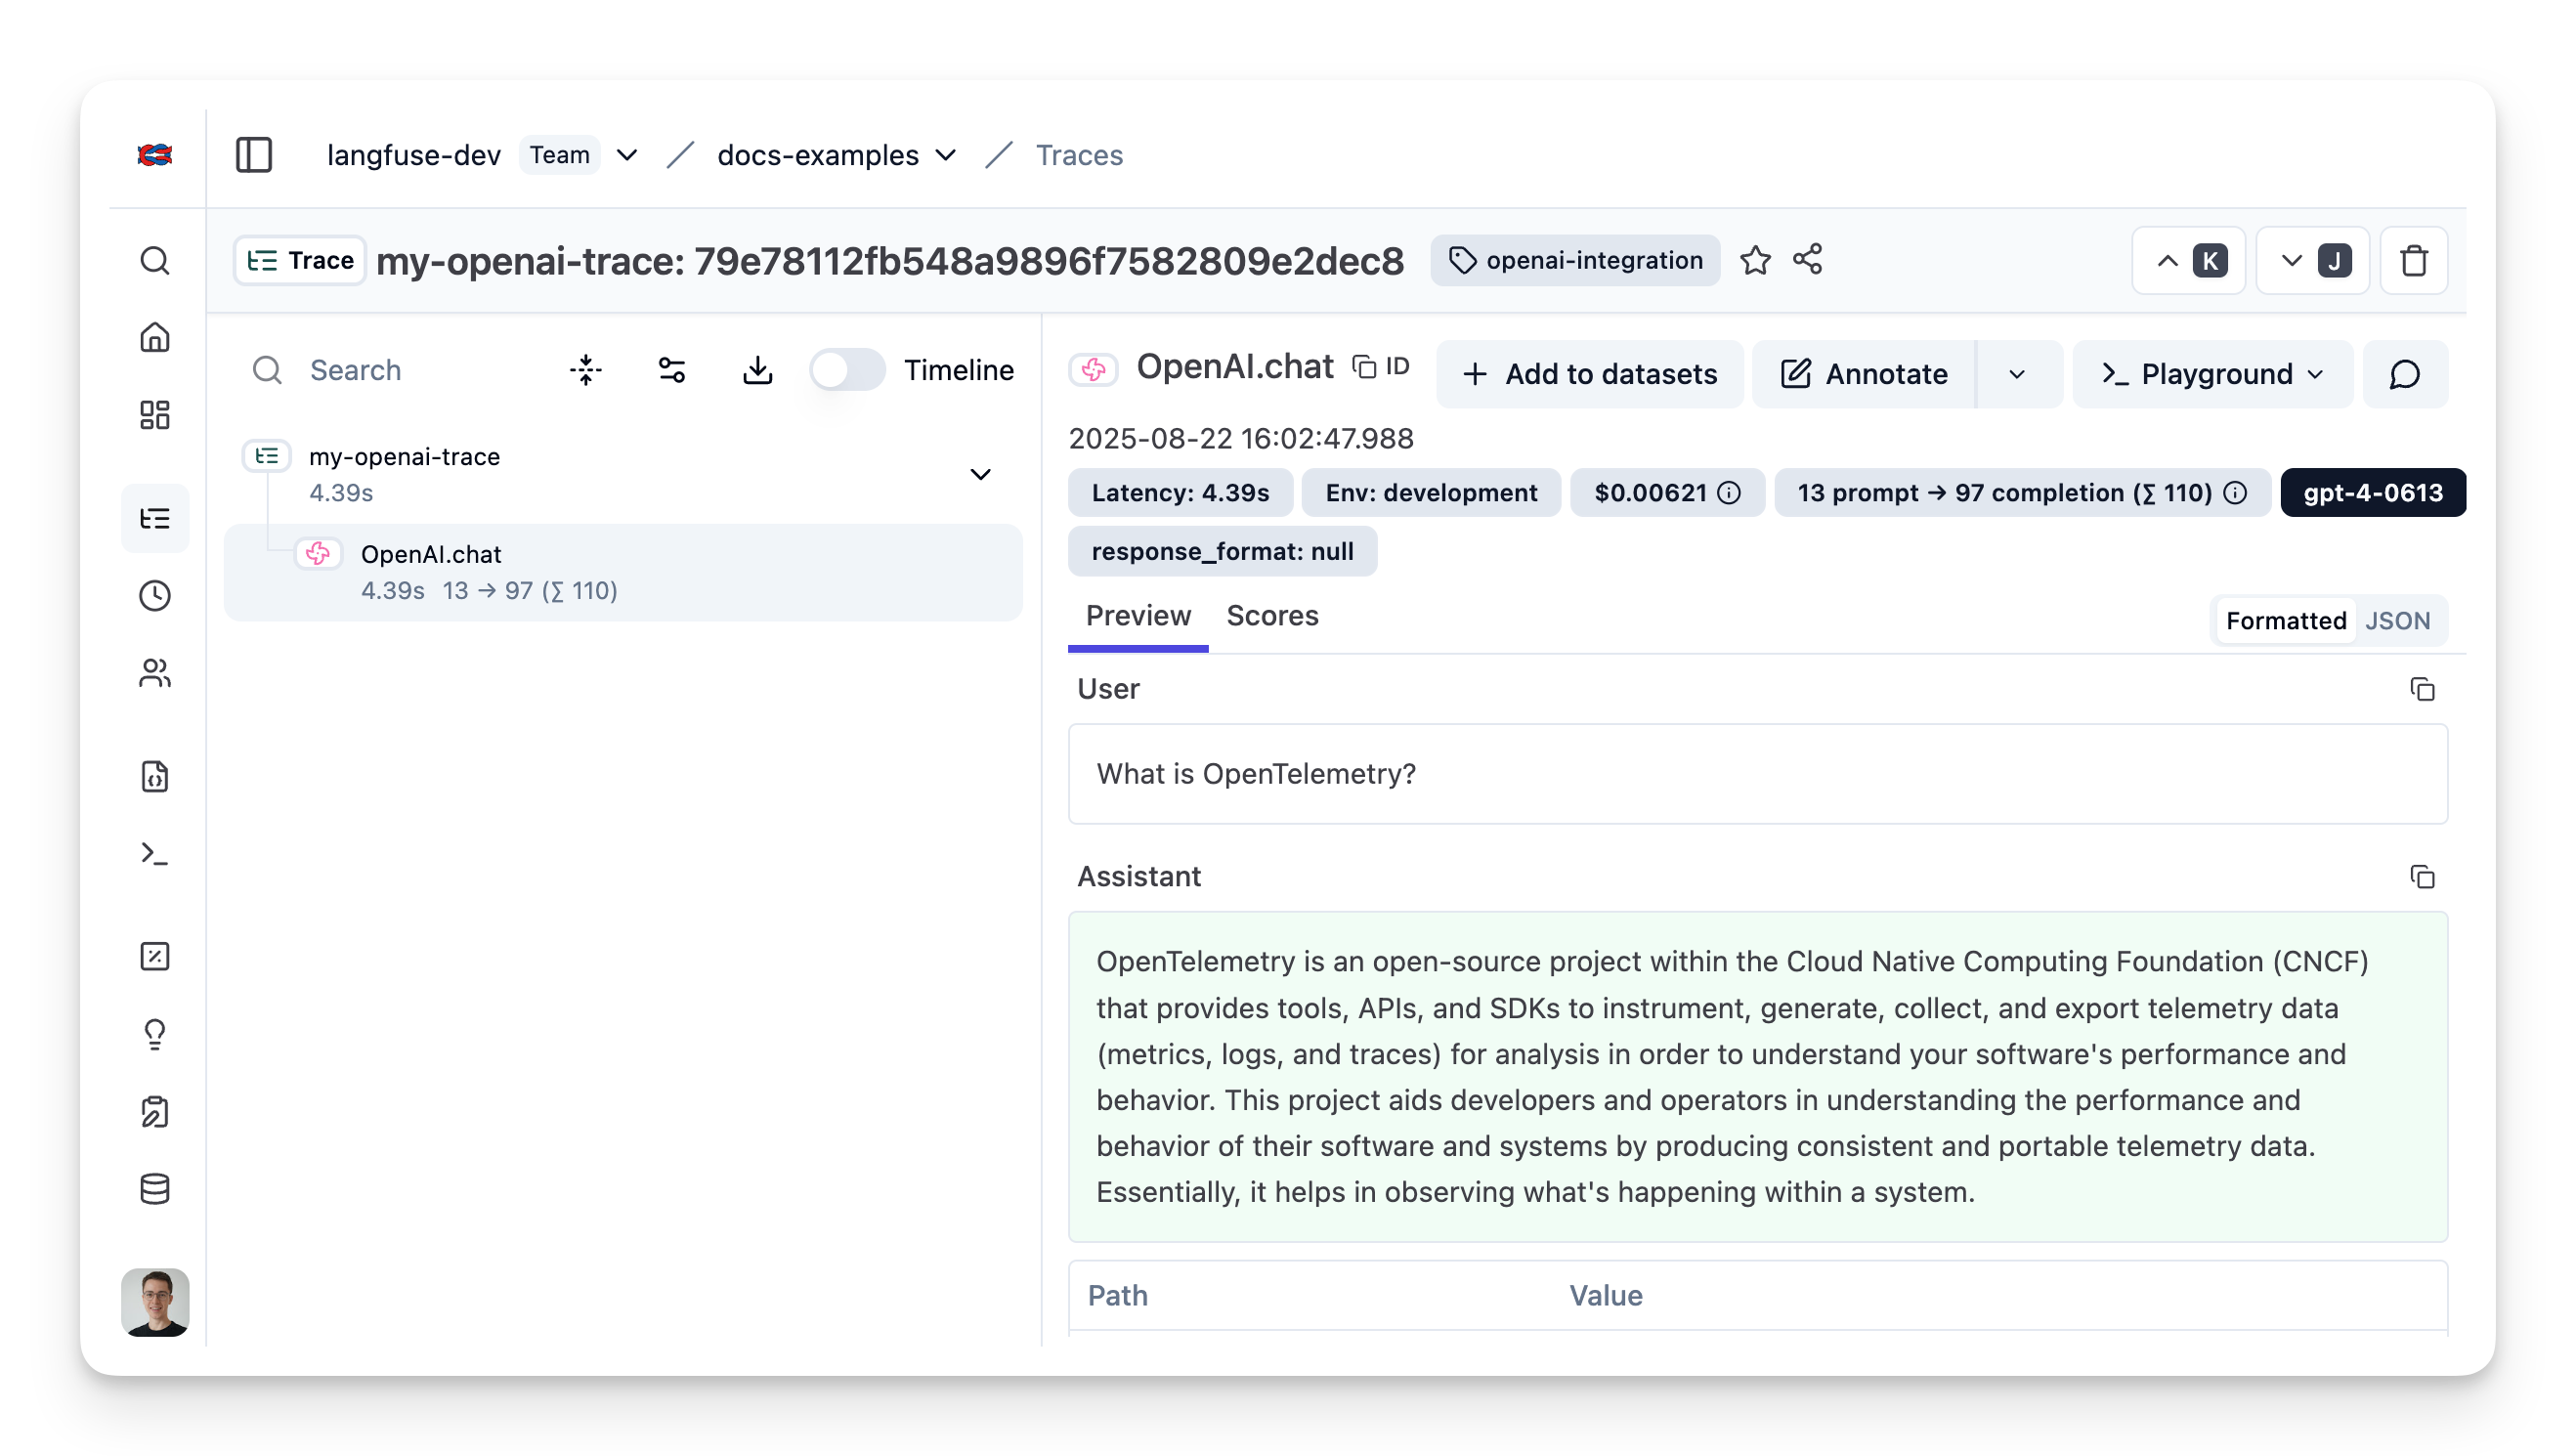
在 Litefuse UI 中查看示例 trace。